Turning a favorite photo into a custom stencil is a creative way to bring personal artwork, gifts, or DIY projects to life. Whether it’s a portrait of a loved one, a pet, or a meaningful object, stencil-making transforms images into bold, paintable designs that can be reused across surfaces like wood, fabric, or walls.
So the big question: Will my photo work as a stencil? The most likely answer is Yes…..with some caveats.
While our team of technicians are talented and great at what they do, there are a few steps that need to be taken before your photo can be considered stencil-ready. Depending on the complexity of your photograph, these necessary steps can take a minimum of 2-4 hours before a mockup is available for you to review.
One of the main points we like to communicate is that not all details within a photo can be converted into a stencil, the same concept applies when turning a complicated logo into a stencil. Our technicians recommendations when picking a photograph you’d like to convert into a stencil include:
- Minimum 300 DPI resolution
- JPEG or PNG format
- Good contrast with low to no background noise
Photographs that do not meet these recommendations, will take a bit more time to process. When converting your photo into a stencil our technicians will take the following steps:
- Assess photo quality
- Increase contrast using vector software
- Trace defining lines on the photo
- Add bridges for stencil integrity
- Generate and send a mockup for your review
- Finalize and cut
Because our talented team of stencil-expert-graphic-artists spend time getting your photo converted to a stencil, there is an additional cost to provide this service. If you’re ready, feel free to get started on turning your photo into a stencil here.
For now though, lets go into more detail on the photo to stencil process.
Assess photo quality
When converting a photo to a stencil, assessing image quality is a critical first step to ensure a clean and usable design. The ideal photo should be high-resolution with strong contrast between the subject and background. Clear, well-lit images will allow key facial features or object details to be easily distinguished.
Our technicians will look for defined edges, minimal shadows, and a simple background that doesn’t interfere with the main figure. Blurry, low-resolution, or overexposed photos can result in vague outlines and loss of important detail, making them unsuitable for stencil conversion. In these cases, our technicians may request a better image to help avoid unnecessary delays. If no other photo is available they will do the best they can and send a mockup your way for approval and make adjustments as needed.
Increase contrast using vector software
When it comes to preparing a photo for stencil conversion, our technicians typically will increase contrast using vector software such as Adobe Illustrator or CorelDRAW. This step is essential for defining the key features(like facial outlines, hair, or object edges) through enhancing the difference between light and dark areas.
Our technicians take care in preserving essential details while eliminating unnecessary elements, ensuring that the final stencil design is recognizable.
Trace defining lines on the photo
Once the photo has been optimized for contrast, our technicians will then trace the defining lines that will form the basis of the stencil. The goal is to capture enough detail for clarity while avoiding excessive complexity that could weaken the stencil or make cutting difficult.
Add bridges for stencil integrity
Once our technicians have defined the stencil lines, it’s time for them to add the bridges. These bridges are inserted for the sole purpose of maintaining the stencils integrity during and after cutting. Bridges are small, strategically placed uncut sections that connect isolated areas within the design—such as the centers of letters (like “O” or “A”) or enclosed shapes like eyes or holes.

Without these bridges, key parts of the stencil would fall out once cut. Which would remove the finer details typically included in stencils made from photographs. Our skilled technicians carefully evaluate where to place these supports to ensure the stencil remains structurally effective while remaining visually unobtrusive.
Final steps
With this final step our technicians will generate your mockup and send it to you for your approval. Once approved our technicians will check the stencil design one final time then cut, review, and ship it to your doorstep.
What our customers are saying
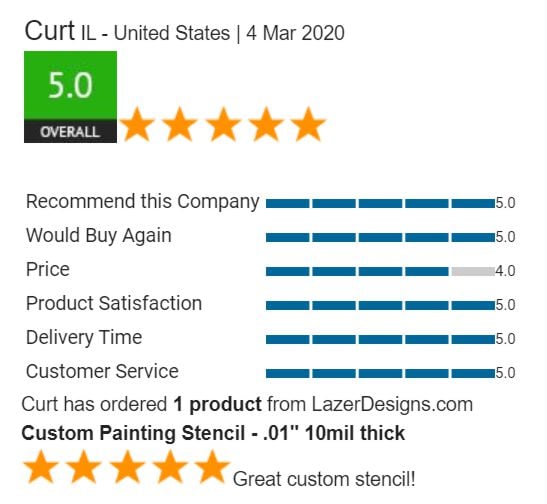
“Great work, I was able to submit a jpeg and you created a stencil. After you sent me your mock-up, I was able to ask for specific modifications.”

“They came quickly and were exactly what we wanted. They were custom made for our company logo. Would 100% buy again.”
“LazerDesigns recreated our brand perfectly as a stencil. They custom cut the stencil after I had reviewed their mock-up. I am very pleased with their work!”
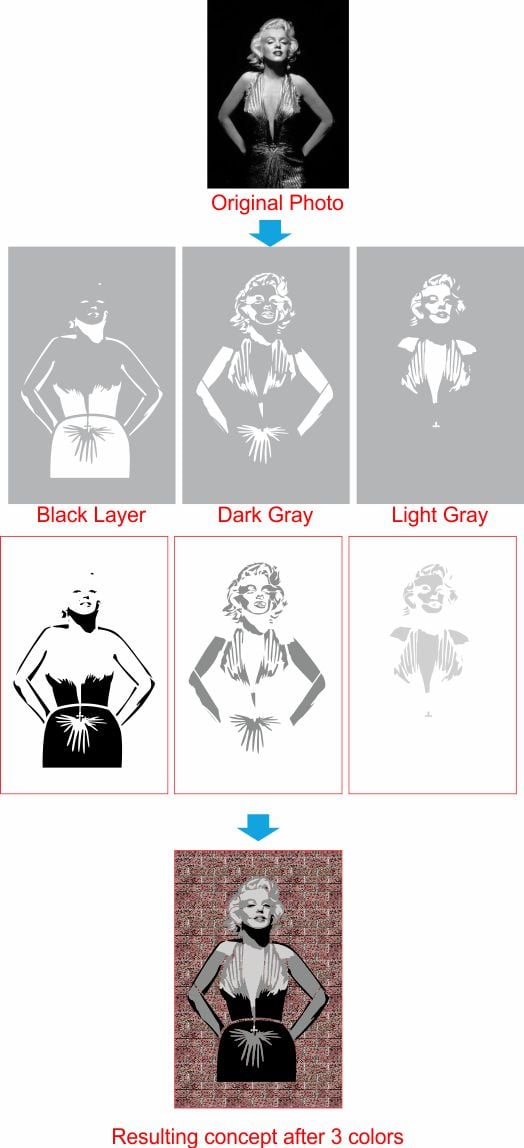
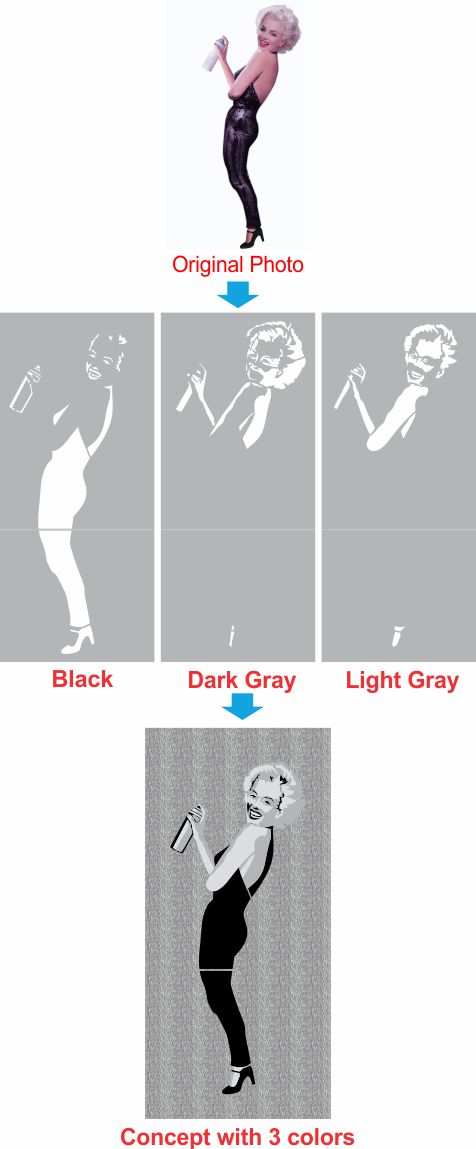
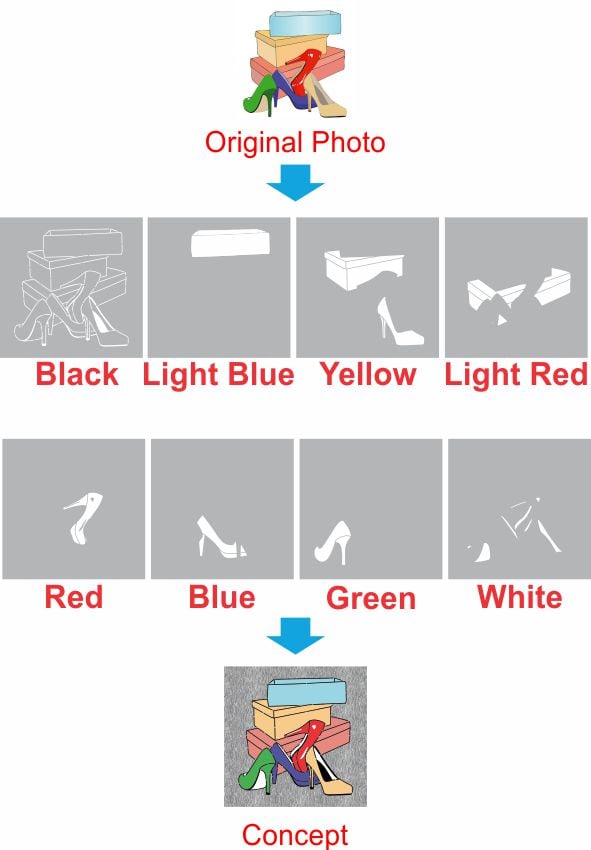
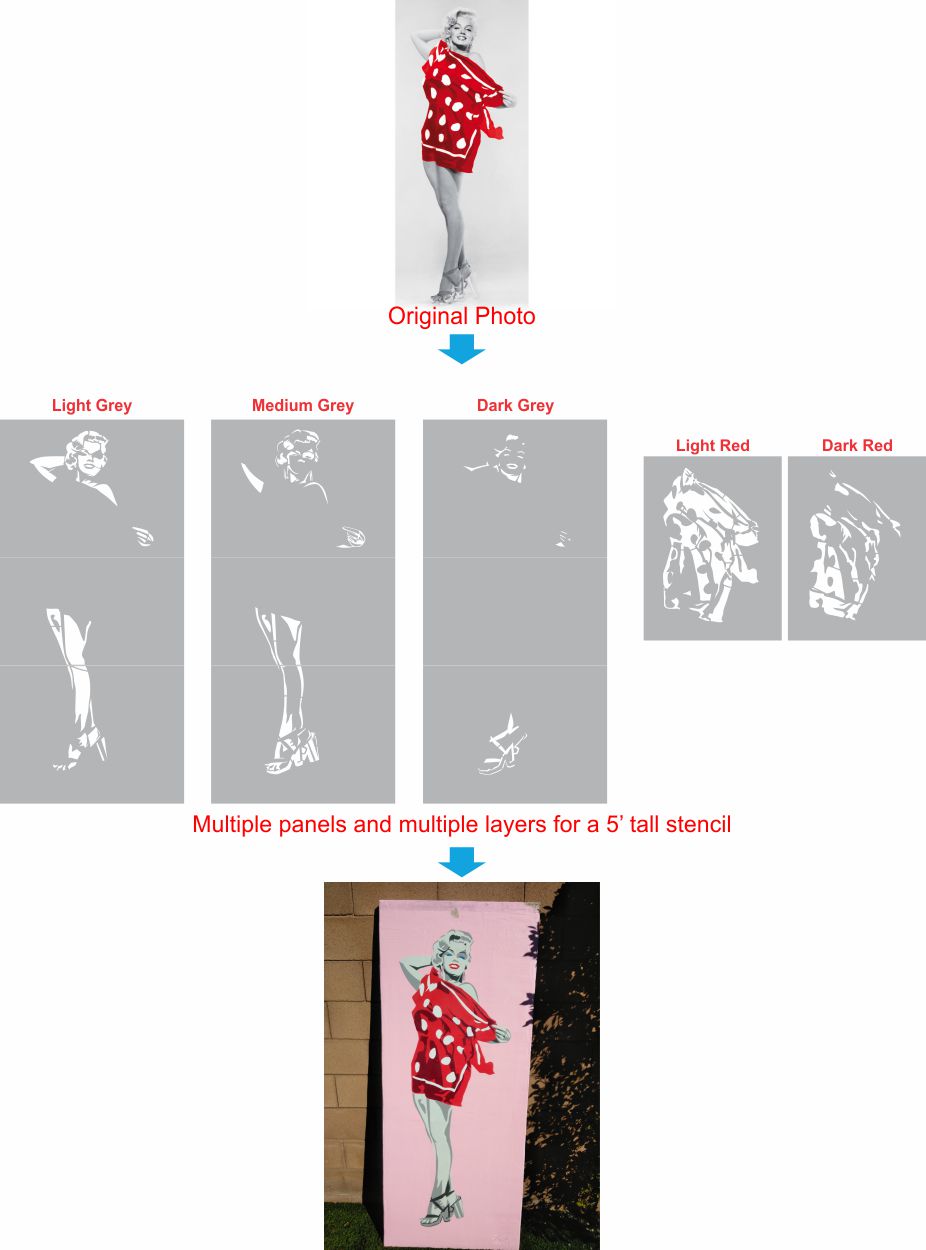
Multi-colored stencils
When a final design requires multiple colors, our technicians can create a separate stencil for each color layer to ensure clean and accurate application. Each stencil will isolate only the areas that need to be painted in one specific color, allowing for precise placement and minimal overlap.
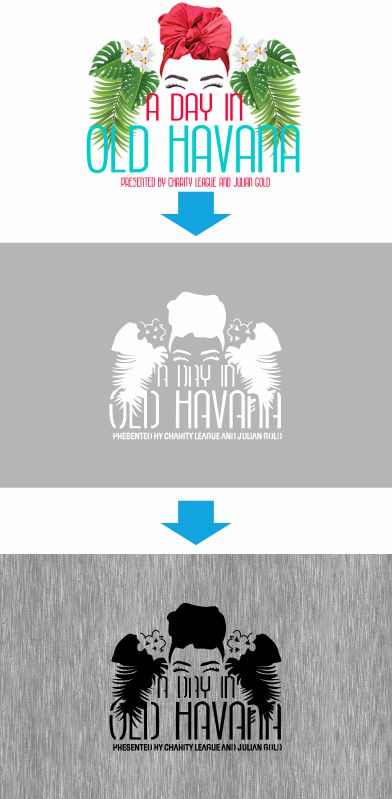
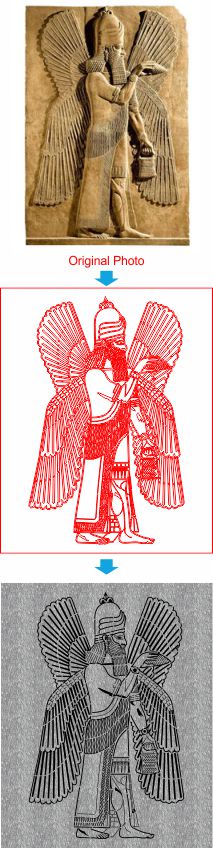
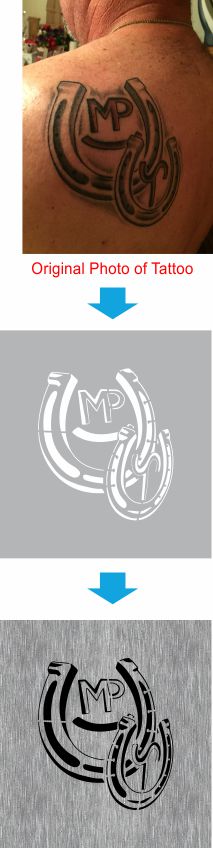
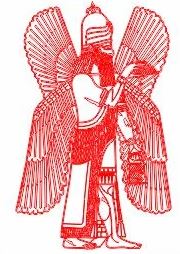
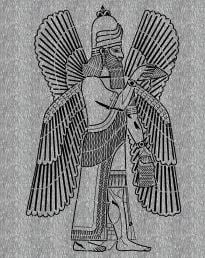
Here are some examples of photos we have turned into a custom painting stencil.