Creating a custom stencil from your logo is a great way to bring your design to life for painting, branding, or decoration. There are multiple stencil materials available and endless possibilities in which your stencils can be used around your place of business and home.
A cut and dry logo without a lot of details is typically a quick and painless process. It’s when we start working with highly detailed or complex logos that we need to take a few extra steps to get it stencil-ready.
Thankfully, our skilled art team has experience working with hundreds of logos and photos every month. From adjusting small details to adding bridges, our team is guaranteed to take almost any logo and transform it into a fully functional ready-to-use stencil.
What do I need to know before converting my logo into a stencil?
First things first, when we start talking about converting a logo into a stencil we need to take a few things into consideration as these factors will determine what the final product will look like, and those are:
- Stencil size
- Level of detail
- Elements and colors
Each of these factors are related directly to the final product. So lets go into more detail.
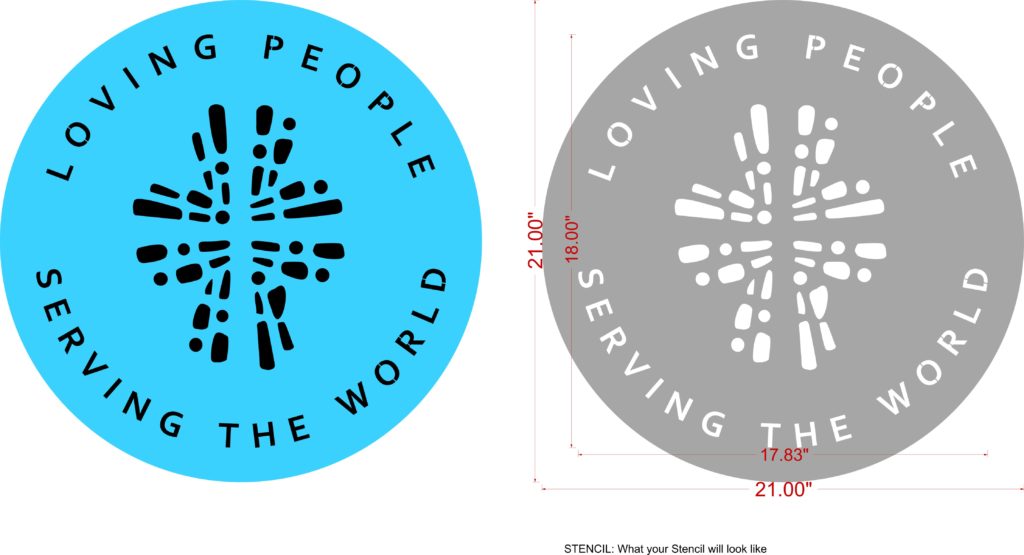
Stencil Size
When it comes to stencils: size matters. Larger stencils (around 10″- 20″ or more) will allow for a more precise rendering of intricate elements which we will go into more detail next. If the stencil is too small, finer details may not cut well or could be lost entirely.
Level of Detail
Does your logo have a lot of fine lines or small, intricate elements? We ask because highly detailed designs (such as insect wings, filigree, or delicate curls) can be more challenging to cut cleanly, which means these smaller details will need to either be removed or adjusted in order to maintain the stencils integrity.
Elements and colors
Logos with close or overlapping design elements, heavy shading, or gradients can lose clarity when converted to stencil format. In these cases, some simplification or modification may be needed to ensure clean cuts.
Keep in mind a stencil is typically only 2 colors – black and white. The design is either cut out (white) or left solid (black.) That’s not to say a complicated, multi color or even full color logo or photograph can’t be made into a great stencil for your painting application, it just means a little more work will be needed to get to that final product.
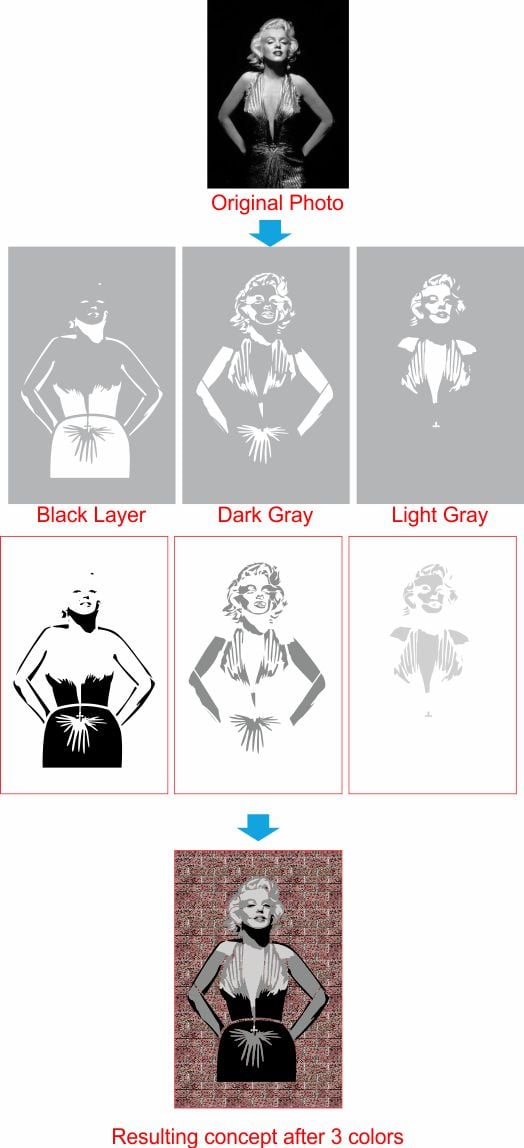
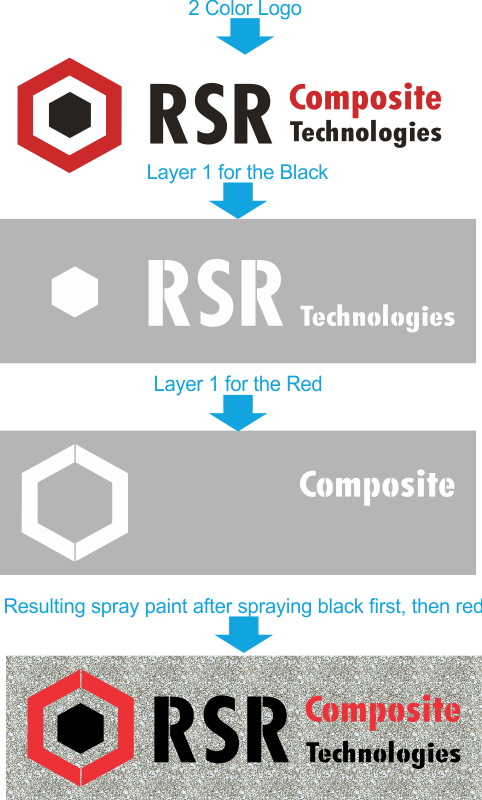
Multi color stencils are also possible by using 2 or more layers of stencils – use one stencil for color 1, lay down a 2nd stencil for color 2, etc.
Here is a great example of how our team was able to create a multi-colored stencil from a photo.
How we prepare your logo or design for stenciling
Not every logo is immediately ready to be turned into a stencil, especially if it includes fine lines, overlapping shapes, or fully enclosed areas. That’s where our experienced art team steps in to ensure your design can be cleanly cut and reused effectively. Just keep in mind that depending on the complexity of your logo: these preparations could take take a minimum of 2-4 hours before a mockup is available for you to review.
Adjusting Fine or Crowded Details
If parts of your logo are too close together or too thin to cut properly, we may slightly adjust or thicken these elements. While our goal is to preserve the look and feel of your original design, making it stencil-friendly will require some slight adjustment to ensure its durability and reusability.
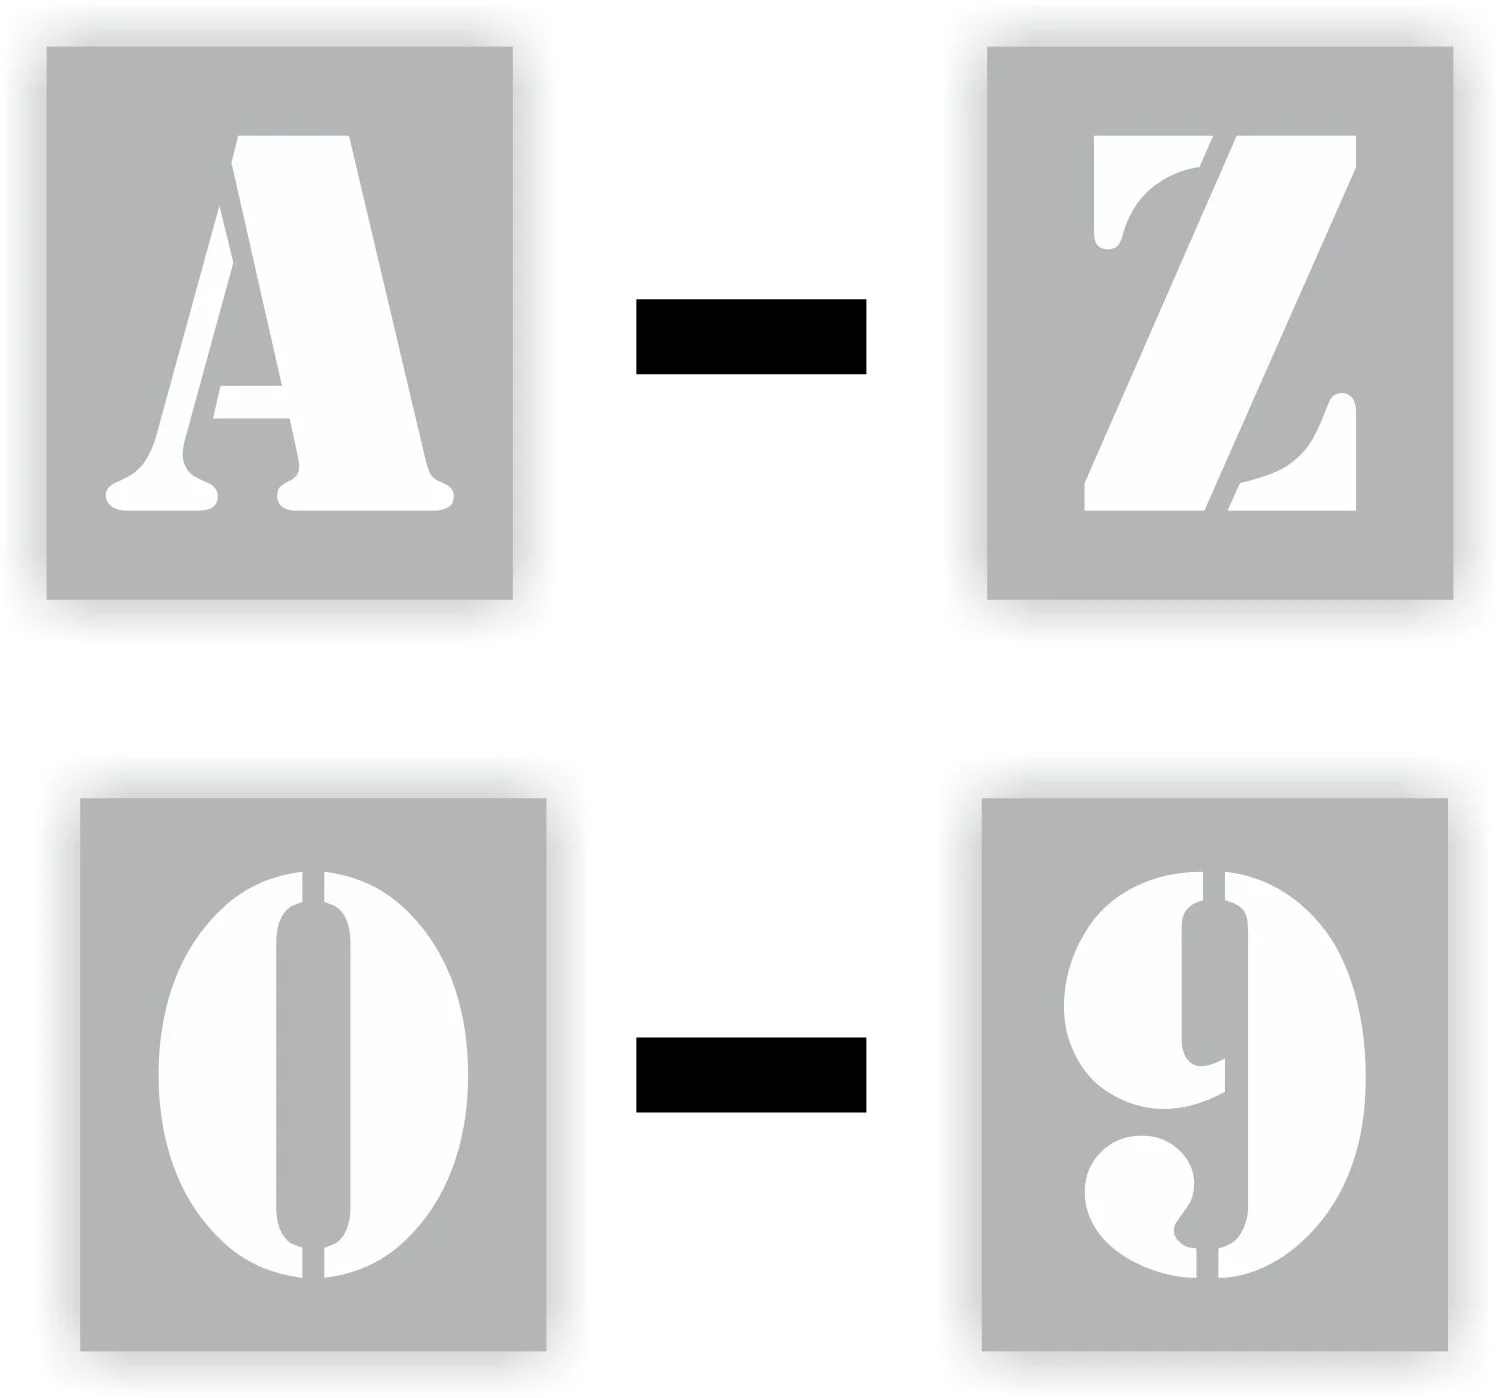
Adding Bridges for Structural Integrity
In stencil design, enclosed areas like the center of an “O” or the hole in a doughnut we need small connectors called bridges to keep them from falling out during the cutting process. Our team strategically places these bridges to maintain the integrity of your design while ensuring it functions well as a stencil.
Notice in the below example how the letters and numbers are not fully cut out. This ensures that the designs are not only clear, but that the stencil itself remains solid.
What is the best material for my stencils?
Our custom stencils are made out of high quality, durable and easy to clean mylar – making them perfectly suited for spray paint, brush paint, detail work.
They work on wood crates, metal dumpsters, parking lots, t-shirts, buildings or any other application.
Mylar has a slight bend to it – the 10mil mylar has flexibility and durability.
We recommend 10mil for almost all applications, especially smaller details. We also carry a 5mil adhesive backed for easy application , magnetic stencils, and even metal stencils.
Here is a comparison chart of all our stencil materials.
Flexibility | ★★★★☆ | ★★★★☆ | ★★★☆☆ | ★☆☆☆☆ |
Durability | ★★★★★ | ★★★☆☆ | ★★★☆☆ | ★★★★★ |
Reuseability | ★★★★★ | ★★★☆☆ | ★★★☆☆ | ★★★★★ |
Smaller, Finer Details | ✔ Ideal | ✔ Ideal | ||
Larger Details | ✔ Ideal | ✔ Good | ||
Small Sized Stencils | ✔ Ideal | ✔ Ideal | ||
Large Sized Stencils | ✔ Ideal | ✔ Ideal | ||
Overall | ★★★★★ ✓ Most Versatile | ★★★☆☆ | ★★★☆☆ | ★★★★☆ |
HOW TO CLEAN YOUR STENCIL:
- If you clean your stencils right away and don’t use permanent paint, you may be able to use warm soapy water to clean them off (depending on what kind of paint you use). But you will probably need to use PAINT THINNER to clean paint off a stencil.
- Lay stencils flat, and scrub gently, cleaning both sides. Be careful not to bend back any pointy parts or tear the delicate, small bridges. If something does tear, you can repair with scotch tape on both sides.
- You can dip a paper towel in mineral spirits and dab as well.
- For super stubborn paint, or paint that has been allowed to dry, use one of the below cleaning agents, and wrap stencil in a garbage bag for 20 minutes allowing it to soak. (or a ziplock bag if small enough)
- For cleaners, you can use “Krud Kutter”, Dawn’s Power Dissolver, Lift Off Latex Paint Remover, Mineral Spirits or low-odor turpentine, carefully with denatured alcohol, acetone or a similar product.
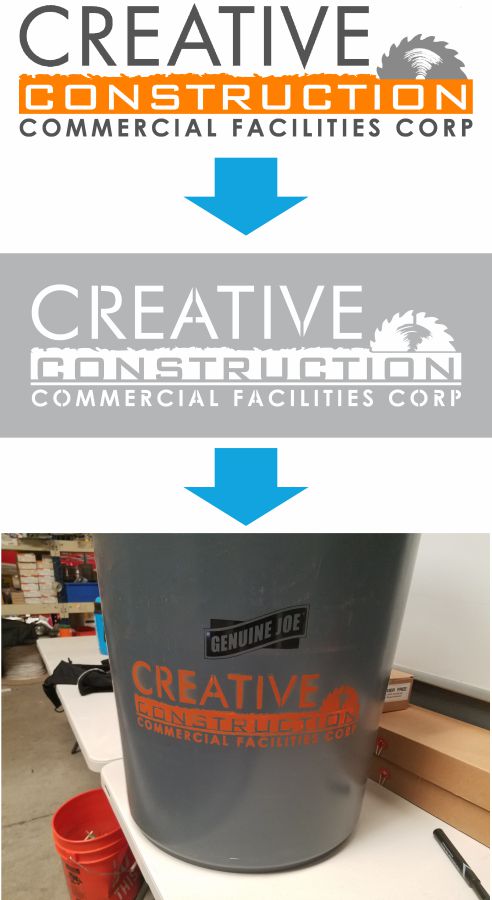
But pictures speak louder than words, see the below examples for great spray paint stencils we made with our clients.
Some of these examples took our talented graphic artists quite a bit of time to achieve the desired result, and may have required additional artwork fees.
Below you’ll see an original logo, what they stencil looks like, and a visualization of what the end result may look like when spray painted.
Note that some of these required extra charges for our graphic designers to modify so they worked as a stencil. Not sure if yours will require an extra charge? You can email your art to us prior to ordering, or just place your order and we’ll let you know after you order, before we charge you.
“Great work, I was able to submit a jpeg and you created a stencil. After you sent me your mock-up, I was able to ask for specific modifications.”
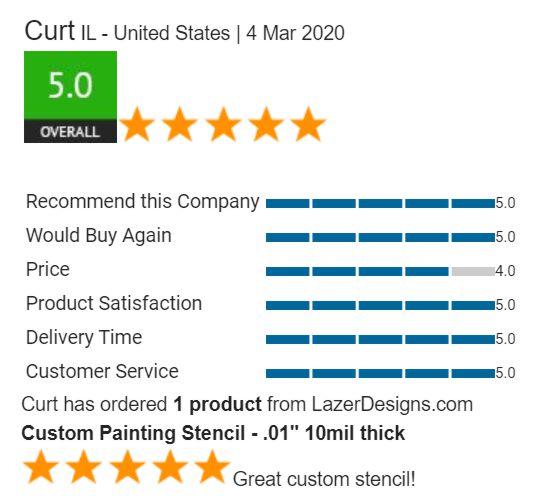
“LazerDesigns recreated our brand perfectly as a stencil. They custom cut the stencil after I had reviewed their mock-up. I am very pleased with their work!”